How to Take Care of Seedlings
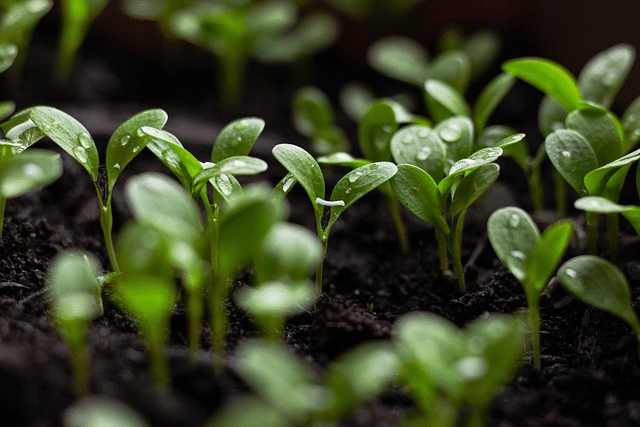
Have you ever thought, “How do they do it?” when you see a lush garden or window sill full of plants? The key is typically caring for young seedlings, those delicate, young plants that promise a rich garden. Learning how to grow and care for seedlings is crucial to developing a lush garden. Seedlings need special care, sustenance, and love to grow into strong, healthy adults.
We'll discuss choosing the correct growing medium and creating the optimum germination environment for new seedlings. We will learn to provide the right amount of light and water to preserve your delicate charges. Mastering these seedling care tips is the key to a successful garden, whether you want colorful flowers or an abundance of organic vegetables. So put on your gardening gloves, dust up your trowel, and let's discover the joy of starting seeds indoors. The green adventure begins here!
What are seeds and seedlings?
Seeds are nature's little wonders. They're the embryos of plants, encapsulated in a protective shell, waiting for the right conditions to sprout. Once they begin to grow, they transition into seedlings. These are young plants, fresh sprouts from the earth, taking their first breaths of life.
A successful garden starts with a humble seed. Both rookie and experienced gardeners can start seeds indoors. This essential step ensures healthy development and abundant harvests, making it the foundation of gardening.
Essential Supplies Needed When Starting Your Plant Seedling
The right seed-starting tools and materials can ensure effective germination and seedling growth. These items are needed to grow seedlings:
Seed Tray:
Choose small seed trays, cell packs, or biodegradable seed starter trays designed for seed starting. These seed trays provide enough space for individual seeds to germinate and develop into seedlings.
Many seed starting trays have clear tops, creating small greenhouses. The soil is warmer and moister. The top keeps soil moisture from evaporating. Once seedlings emerge, they can tolerate environmental changes and remove the cover.
Potting Mix and Garden Soil:
Opt for a high-quality potting or soil mix specifically formulated for young plants. Mix it into your garden soil for proper aeration, drainage, and moisture retention, creating an ideal environment for seed germination and early growth.
Seeds:
Select seeds that are well-suited for your growing conditions and preferences. Starting indoor seedlings requires choosing the correct seeds, including GMO choices. Choose reliable sources for high-quality seeds. Consider factors that may affect the seedlings, like climate, frost date, exposure to direct sunlight, and desired plant type.
Seedling Heat Mat and Transparent Dome:
Particularly in cooler climates or during early spring, a seedling heat mat can provide consistent bottom heat, promoting faster and more uniform germination. A transparent dome or plastic wrap can create a mini greenhouse effect, helping to maintain humidity and warmth around the seeds during germination.
Light Source for Seedlings:
Adequate light is essential for healthy seedling growth or other indoor plants. Consider using fluorescent or LED grow lights a few inches above the seedlings if you have a limited sunny location. This ensures they receive enough light for optimal development.
Watering Can or Spray Bottle:
Use a watering can with a delicate rose or spray bottle to water the seedlings and moisten the soil gently. Avoid overwatering delicate seedlings, leading to damping-off disease and other issues. Too much water can cause tiny roots to rot while too little will see your new babies shrinking and even dying.
Diluted Fertilizer:
Once the seedlings develop their first true leaves, feed them with a balanced liquid fertilizer to provide essential nutrients for growth.
Plant Markers or Labels:
Plant markers or labels help you remember what's what, especially when dealing with multiple plant types. This is crucial for keeping track of your seedlings' growing and planning when to transplant them
How to Take Care of Seedlings
Preparing the Growing Environment
Creating the ideal seedling growing environment is the first step towards nurturing strong and healthy plant seedlings. Just as a well-designed stage enhances a theatrical performance, a carefully curated environment lays the foundation for your seedlings' growth journey. Whether you are preparing for indoor or outdoor plants.
Choosing the Right Soil
Soil is to plants what homes are to humans. It provides nourishment, support, and protection. For seeds and seedlings, a well-draining, nutrient-rich soil works wonders. Ever heard the saying, “You are what you eat”? Well, plants are what they grow in! A growing medium is your seedlings' soil, the nurturing embrace that cradles their roots. An ideal medium strikes a balance between water retention and aeration. A mix of peat moss, vermiculite, and perlite creates an environment that retains moisture while allowing excess water to drain. This balance is essential for preventing waterlogged roots and ensuring optimal growth conditions.
Ensuring Proper Drainage
Think of drainage as the escape route for excess water. Proper drainage prevents water accumulation which can lead to suffocating roots and root diseases. Water your plants when the surface of the soil is dry to the touch. Ensure your containers have drainage holes, allowing excess water to escape and ensuring a well-ventilated root zone.
Choosing the Right Containers
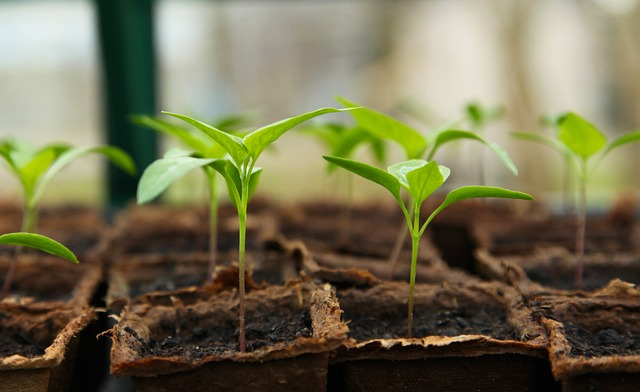
Imagine choosing the right home for your seedlings. Containers are their dwellings, and making the right choice ensures comfort and ample space for growth. Opt for larger containers with drainage holes, preventing water accumulation and leading to root rot. Biodegradable seed starter trays or peat pots offer the added advantage of being transplantable, reducing stress during the transition to the garden.
Depth and Spacing Guidelines when Growing Indoor Seedlings
Planting seeds isn't about digging random holes and throwing them in. There's a method to the madness! Each seed variety has specific depth and spacing requirements. Remember the age-old phrase, “Give them space, and they'll grow in grace.”
Proper depth and spacing are key for their successful growth when growing indoor seedlings. Plant seeds at a depth recommended on the seed packet – 2-3 times the seed's diameter. Adequate spacing is vital to prevent overcrowding as seedlings develop. Follow the guidelines on the seed packets for spacing between seeds and rows. This will ensure enough room for each plant to receive light and nutrients. By giving your indoor seedlings the right start in terms of depth and spacing, you set the foundation for strong and healthy plants ready for transplanting.
How To Take Care of Young Seedlings After Germination
Watering Seedlings
As every living being requires water to thrive, your seedlings are no exception. Water is the elixir of life, and mastering the art of seedling watering is essential for their growth journey.
Overwatering is a common pitfall, akin to giving too much love. Soggy soil hampers root function, resulting in stressed and weakened seedlings. To avoid this, let the top inch of the growing medium dry out before watering again. Feel the soil with your fingertip; if it feels damp, hold off on watering. By letting the soil breathe, you're preventing root rot and ensuring your seedlings thrive.
Underwatering is like depriving your seedlings of the essentials. Monitor the moisture level diligently, especially during warmer days when evaporation rates are higher. Wilting is a telltale sign of underwatering, as your seedlings struggle to draw enough water from the soil. A consistent watering schedule and observation are your allies against this issue.
Ensure Proper Light
In the journey of nurturing seedlings indoors, light is the guiding star. Understanding their light needs and providing artificial lighting as needed guarantees proper growth. Your smart lighting choices brighten the environment of the seeds sprout as they grow.
Consider light to be a language that your seedlings can understand. Different plants need different conditions, ranging from full sun to light shade. Investigate the light preferences of the seedlings you're raising. Most seedlings thrive in bright, indirect light. A south-facing window provides the ideal mix, but artificial grow lights can be your buddy if natural light is scarce. Remember that too much light can kill your delicate small seedlings
Using Grow Light
Think of grow lights as your seedlings' sun. Full-spectrum grow lights mimic natural sunlight, providing the essential wavelengths needed for photosynthesis. Position the lights a few inches above the young seedlings, adjusting their height as the plants grow. Timers can maintain a consistent light schedule. Make sure your seedlings receive the right nourishing light.
Hardening Off Seedlings
Picture hardening off as a graduation ceremony for your seedlings. Before transplanting them into the garden, they need time to adapt to outdoor conditions. Over a week, gradually expose them to increasing periods of outdoor light. This acclimatization process prepares them for the challenges of the external world, reducing the risk of shock during transplantation.
Maintaining Ideal Soil Temperature
As we seek comfort in the right temperature, your seedlings thrive when cozily nestled within their preferred range. Temperature is crucial in their growth journey, affecting everything from germination to overall health.
Heat Requirements for Seedlings
Imagine temperature as a warm hug your seedlings crave. Most seedlings prefer daytime temperatures between 65°F to 75°F (18°C to 24°C) and slightly cooler temperatures at night. These ranges provide the optimal conditions for metabolic activity, allowing your young plants to grow efficiently and robustly.
Using Heat Mats and Thermometers
Think of heat mats as a cozy blanket for your seedlings' roots. Placed beneath the seedling trays, heat mats provide gentle warmth, encouraging faster germination and root development. To monitor the temperature accurately, use a thermometer placed near the seedlings. This allows you to make necessary adjustments to maintain the desired temperature range.
As a caregiver of seedlings, you hold the thermostat to their growth. By providing the right temperature range, you ensure they have the comfort they need to thrive. Whether it's using heat mats to create an inviting root zone or diligently monitoring temperatures with a thermometer, your dedication to maintaining ideal temperatures sets the stage for a flourishing garden filled with healthy, vibrant plants.
Providing Good Air Circulation
Giving your seedlings excellent air circulation is like giving them a breath of fresh air. Seedlings benefit from modest air movement in the same way that we do. Placing a fan near your growing seedlings indoors or opening a nearby window regularly will help prevent mold and illnesses from taking hold. This breeze also helps to strengthen their stems, preparing them for outside life. Remember that a bit of air goes a long way toward keeping your young plants healthy and robust.
Fertilize Seedlings
Just as nourishment fuels our bodies, proper fertilization is the key to unlocking your seedlings plants' growth potential. Fertilizers provide the essential nutrients your young plants need to flourish, but understanding the delicate balance organic fertilizers is crucial. In this section, we'll explore the art of fertilization and how to ensure your seedlings receive the nutrients they crave.
Selecting the Right Fertilizer
Think of fertilizer as a carefully curated menu for your seedlings. Different stages of growth require different nutrients. Look for a balanced, water-soluble fertilizer with a lower concentration of nitrogen. Nitrogen promotes leafy growth, but too much can lead to elongated and weak stems. A balanced mix of nutrients, including phosphorus and potassium, supports root development and overall health.
Schedule for Seedlings Fertilization
Imagine a feeding schedule as a regular family mealtime for your seedlings. Begin fertilizing a few weeks after germination when the initial nutrients in the growing medium have been used up. Follow the manufacturer's recommendations for dilution and frequency. Remember that a little goes a long way, and it's better to slightly under-fertilize than to risk over-fertilization.
You hold the recipe for your seedlings' growth with your nurturing hands. By selecting the right organic fertilizer and adhering to a balanced feeding schedule, your young plants provide all the nutrients and sustenance they need to thrive. Like a chef crafting a masterpiece, you ensure that every element is in harmony, resulting in vigorous, healthy seedlings that will eventually grace your garden with their beauty.
Thinning Overcrowded Seedlings
Thinning overgrown seedlings is necessary for proper growth. To thin them, gently remove the weakest seedlings and leave room between the others according to the seed packet. If more than one seedling develops in each cell, they must be thinned. This helps the remaining seedlings thrive, get nutrients, proper root growth and develop strong.
Hardening Seedlings and Potting
Before moving your seedling outdoors or to the big wild world of the garden, they need acclimatizing. It's like preparing a child for their first day at school. Gradually exposing them to outdoor conditions strengthen seedlings, hardens them off, and readies them for transplanting.
Potting up seedlings regularly ensures their growth. Seedlings are ready for a larger home after growing their first set of “true leaves” (the leaves that match the plant's mature leaves). Their roots have outgrown their pots and are seeking more nutrition. By stretching their roots, they can thrive in larger pots with fresh potting soil. Be gentle with the seedlings to minimize root disruption and let them acclimate to their new environment.
When To Transplant Seedlings Into Your Garden
Imagine transplanting as a well-timed journey to a new destination. Wait until your seedlings have developed a robust root system and have at least two sets of true leaves. Also, consider the weather—transplant on a calm, overcast day or early evening to minimize stress from intense sunlight. Moving directly from an indoor pot to outdoors can be a shock. Plan time to expose your seedlings to the new environment by setting them outdoors each day for a few days before transplanting to give them time to adjust to the new environment.
Transplanting Techniques
Think of transplanting as a gentle relocation process. Handle seedlings by their leaves, avoiding the delicate stem, which can be easily damaged. Dig a hole in the garden slightly larger than the seedling's root ball. Gently place the seedling in the hole, backfill with soil, and press down gently to secure it. Water thoroughly to help settle the soil around the roots.
Transplanting is a significant milestone in your seedlings' journey, akin to stepping into a new chapter of life. With the right timing and gentle techniques, you ensure this transition is a positive experience for your young plants. Your care and attention during transplanting set the stage for their continued growth and becoming robust plants.
Troubleshooting Common Seedling Care Problems
Leggy Seedlings
Your seedlings may be leggy if tall and spindly with weak stems. Seedlings reach inadequate light sources to get more sunlight. Provide brighter light by placing seedlings beneath a bright grow lamp or near a sunny window. Keep the light source a few inches above seedlings to avoid straining. If you observe legginess early, gently brush your palm over the seedlings a few times a day to simulate wind, which can strengthen the stem.
Pests and diseases
Proactive measures can help seedlings overcome pests and diseases. Remove clutter and clean your growing area. Sanitize containers, use a sterile seed-starting mix and rotate crops to avoid sickness. Use neem oil or insecticidal soap for pests and copper-based fungicides for fungi. To detect concerns early and promote healthy growth, check seedlings often.
Damping Off
Damping off is a common issue that affects plants, especially tomato seeds, during their early stages of growth. It's a fungal disease that occurs in moist and cool conditions. Damping off can cause the young seedlings to become weak and eventually collapse at the soil level. To prevent damping off, ensure proper ventilation and consistently moist soil. Use well-draining soil and sterile containers to start your seeds. If you notice any signs of damping off, such as wilting or discoloration, remove the affected seedlings to prevent the spread of the disease. Maintaining proper humidity, sanitation, and care can reduce the risk of damping off and help your tomato seedlings thrive.
Conclusion
In conclusion, raising seedlings is a rewarding experience. These delicate shoots depend on us to regulate their environment and protect them from stressors, so we must be alert. Stay aware of your seedlings' needs as they grow toward the sun. The delicate dance from seed to solid plant is your responsibility as a gardener: protector and guide.
Take this article about how to take care of seedlings to guide you as you journey to your dream garden. Remember that growing seedlings require patience, dedication, and learning. Your labor and love for the plant kingdom's beauty will pay you as those tiny cotyledons grow into strong stems and rich leaves.
Let your hands get filthy, your heart connect with growth, and your mind expands with new information. Seedling care is a gateway to a world of wonder that fills the soul and soil. Happy gardening!
FAQs
When should I start fertilizing my seedlings? Using a balanced, water-soluble fertilizer, begin fertilizing your seedlings a few weeks after germination.
How can I prevent damping-off disease in my seedlings? Avoid overwatering, use a sterile growing medium to prevent damping-off disease, and provide good air circulation.
Can I use regular indoor lights for growing seedlings? While regular indoor lights can work to some extent, full-spectrum grow lights are more effective in providing the right light spectrum for seedling growth.
What is the best way to acclimate seedlings to outdoor conditions? Gradually acclimate seedlings outdoors for increasing periods each day over a week.
Should I remove the bottom leaves of my seedlings before transplanting? Removing the bottom leaves can promote better air circulation and prevent disease risk when transplanting seedlings.